> ## Documentation Index
> Fetch the complete documentation index at: https://juo.io/docs/llms.txt
> Use this file to discover all available pages before exploring further.
# Klaviyo

# Enable Klaviyo integration
To integrate with Klaviyo, you first need Klaviyo’s **Private API Key**. You can find in Klaviyo, under **Settings** > **Account** > **API Keys**.
Scroll down to Private API Key and copy the key to clipboard.
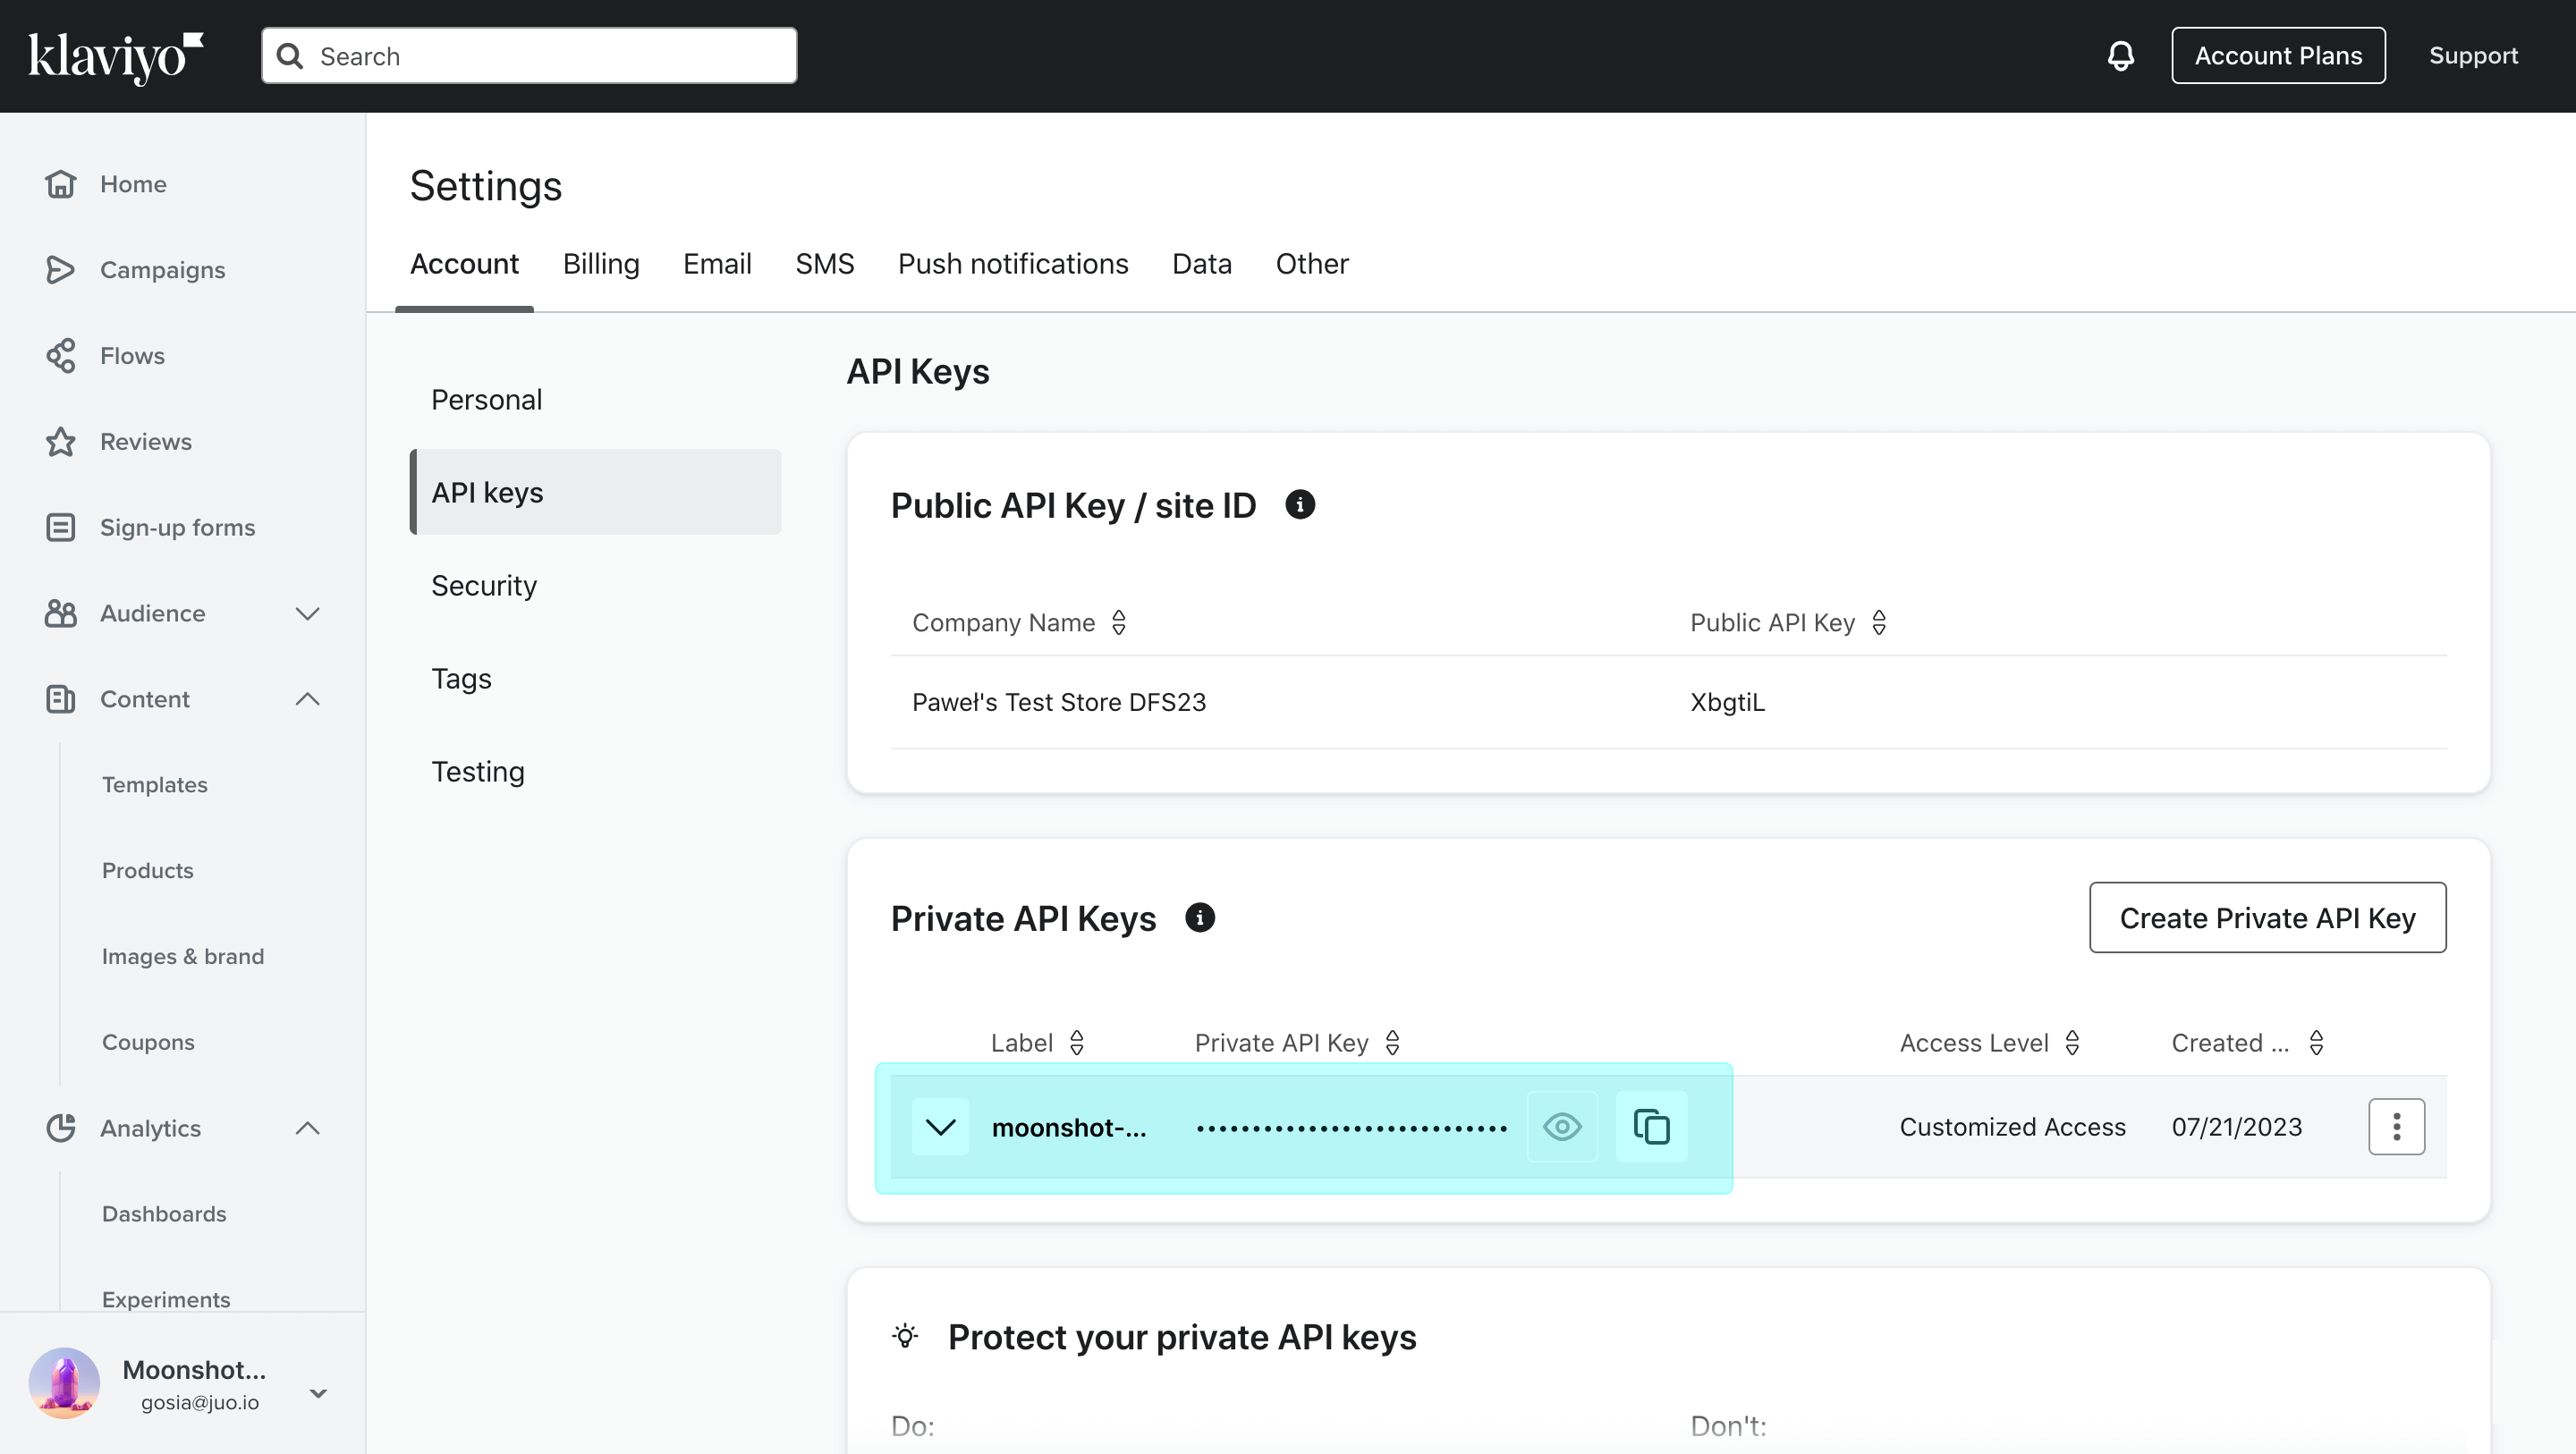
Juo needs Private API Key (not Public) to integrate with Klaviyo, so if you don’t have a Private Key, you need to create one first.
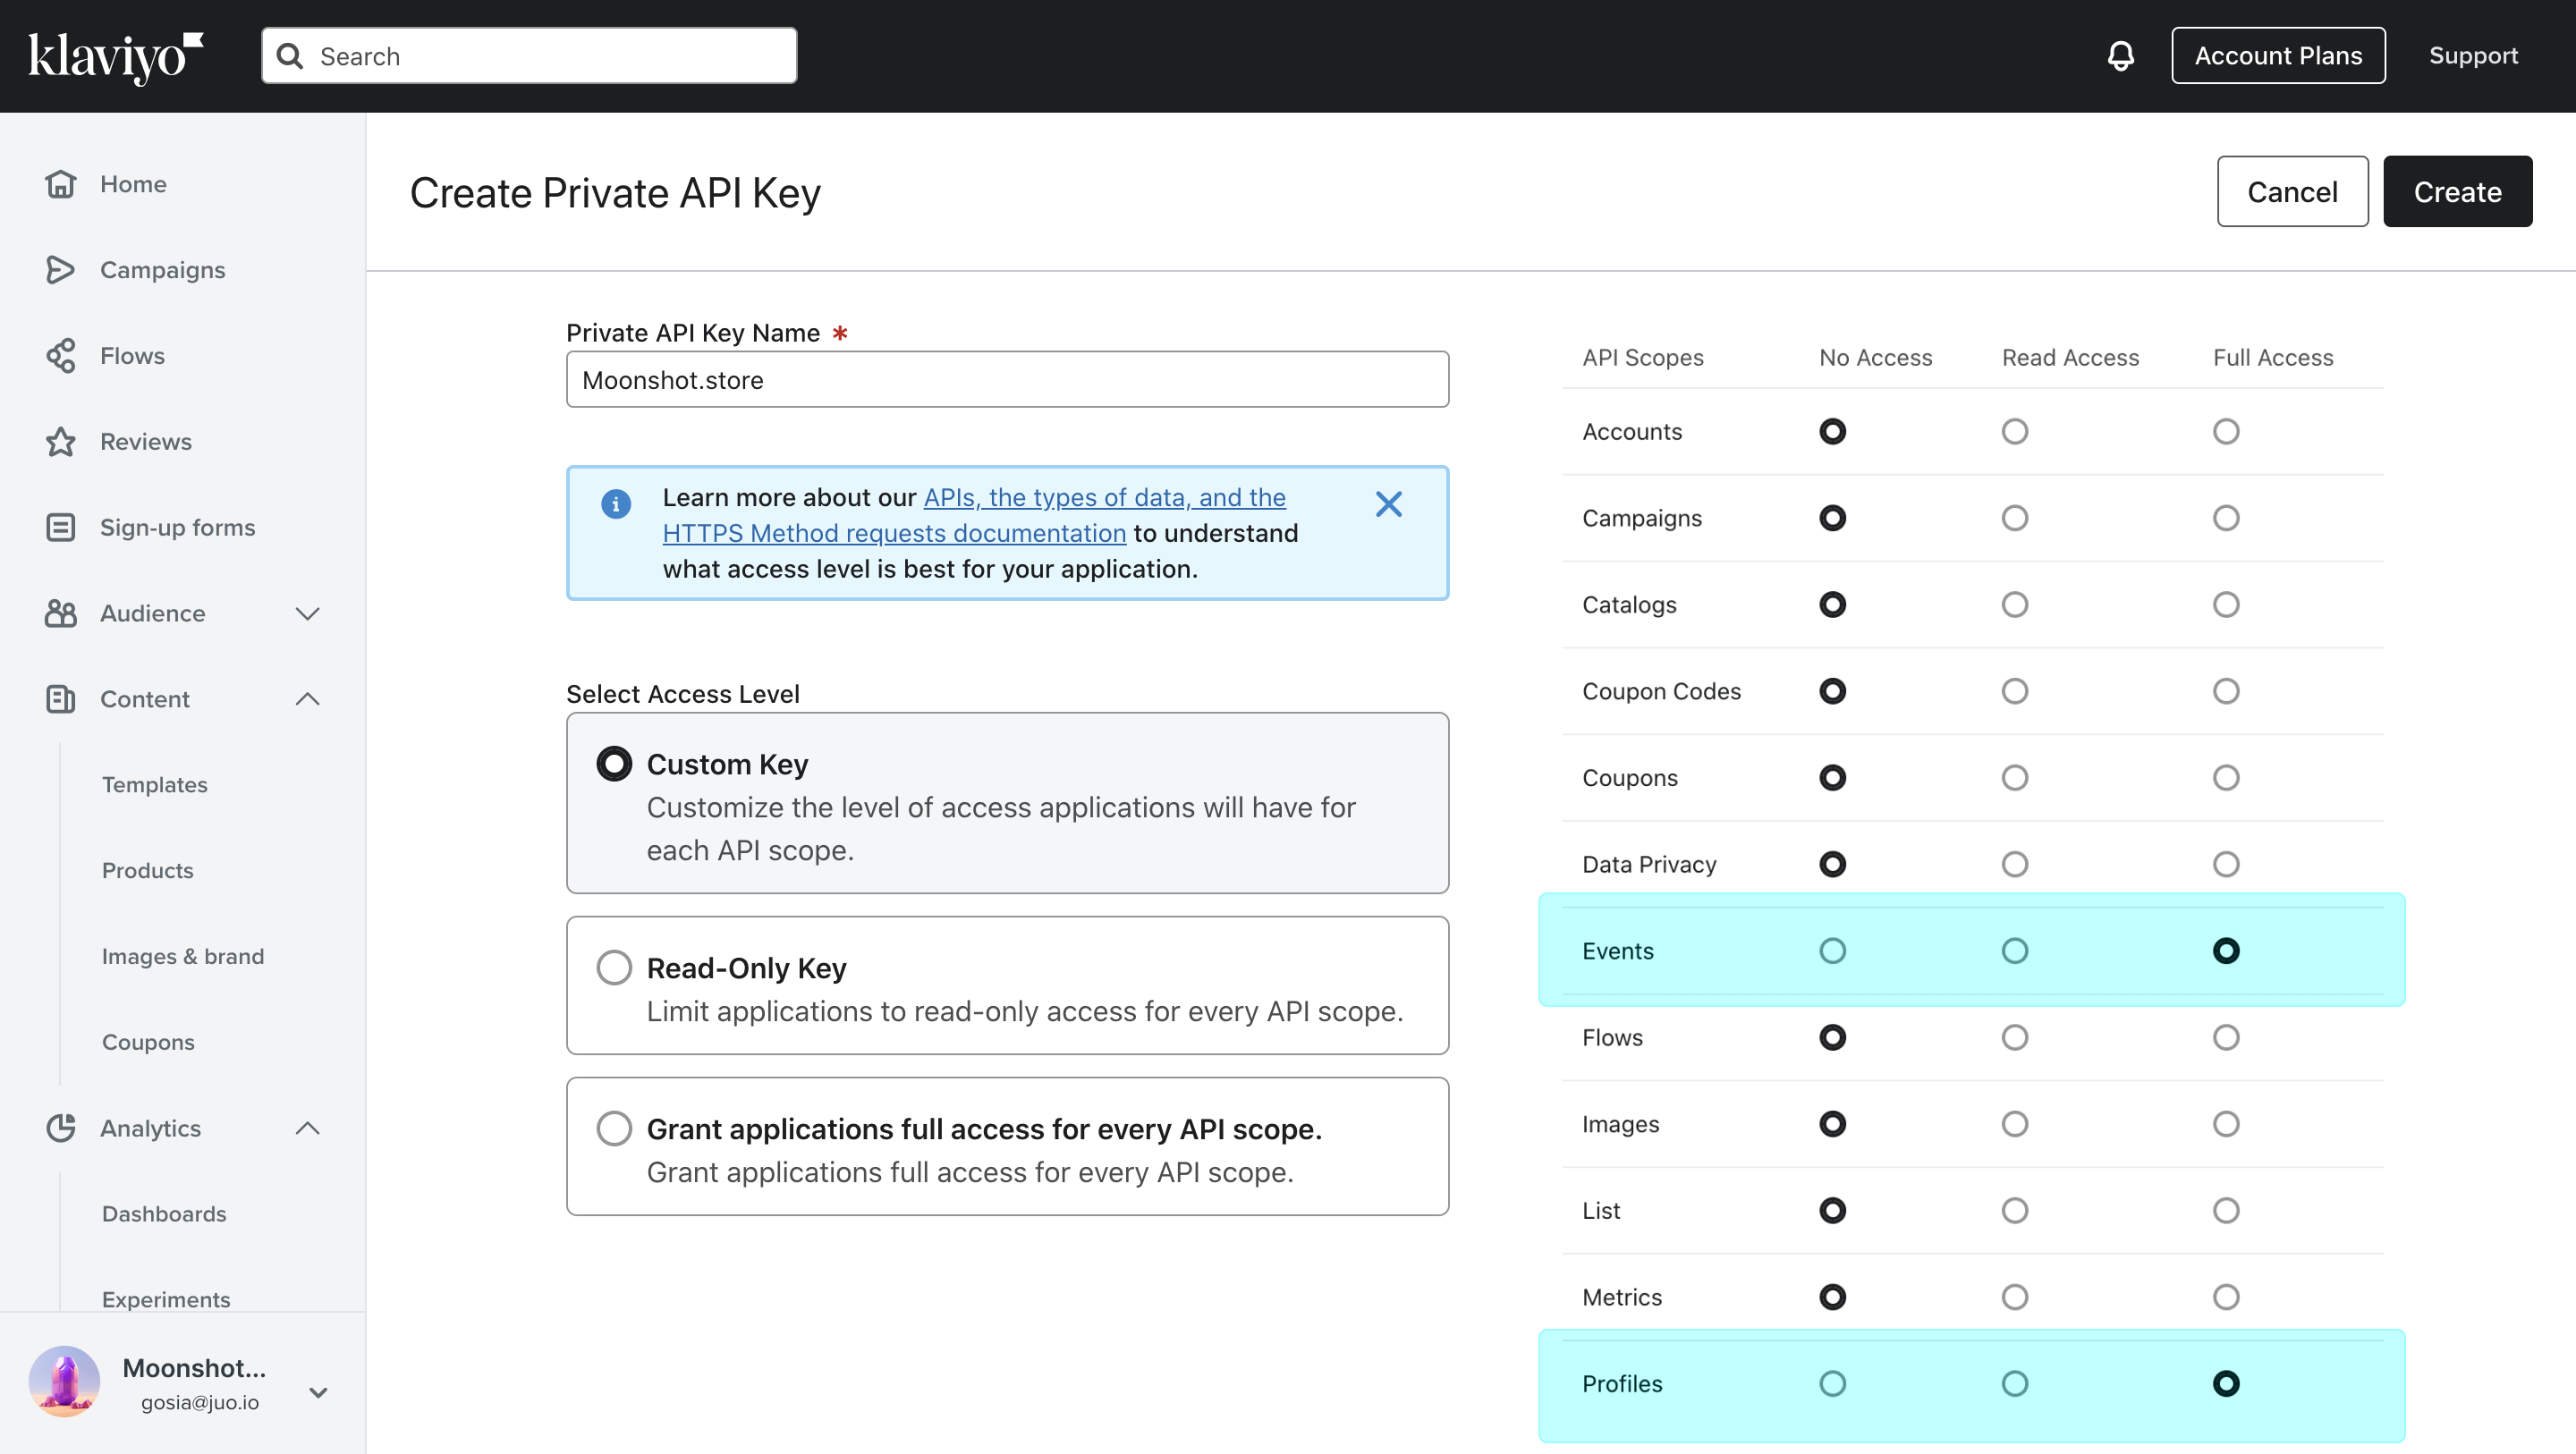
To do this, click on “Create API key” in the **Private API Keys** section.
Next, select **Custom Key** Access level and give **Full Access** to API Scopes **Events** and **Profiles**.
Click “Create” to save your Private API Key and you’re ready to follow through with the integration.
## **Juo \<> Klaviyo integration**
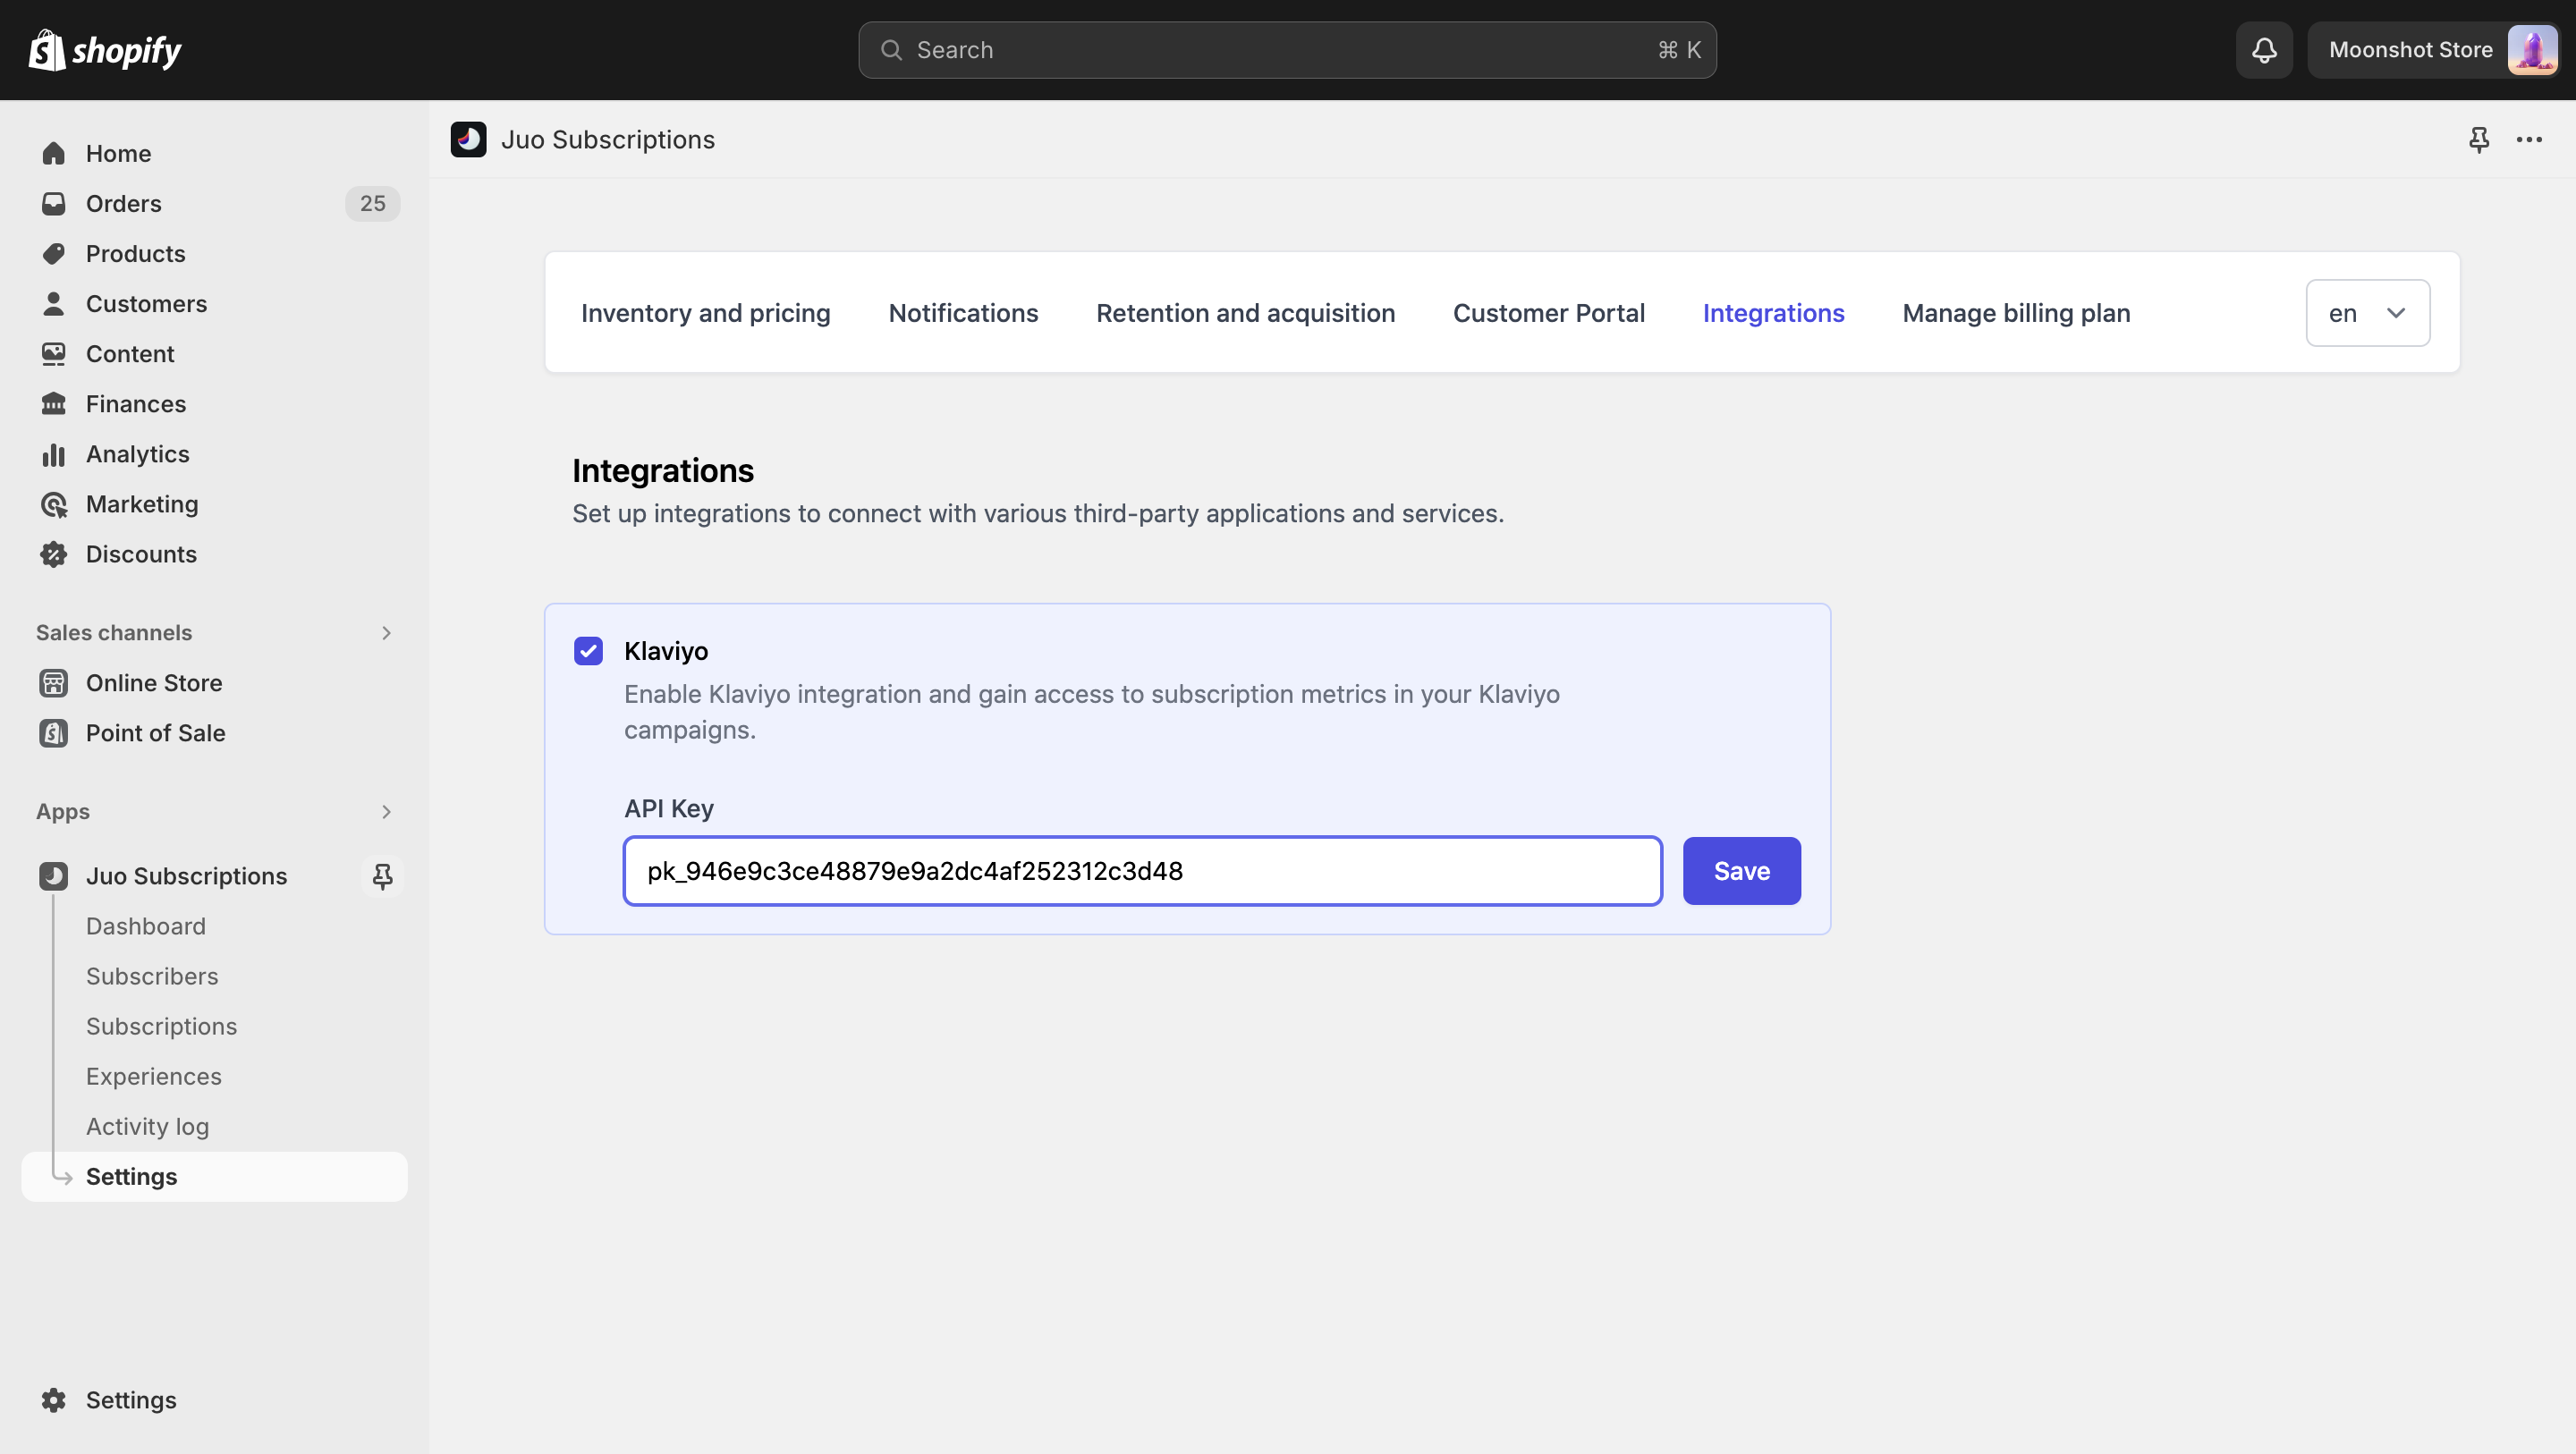
In the Juo App, open the **Settings** tab and select **Integrations** from the top navigation bar.
Next, enable Klaviyo and paste the Private API Key in the input field that appears. Hit “Save” to confirm.