Juo Build-a-box is a dedicated page where customers can select their favorite
products, claim discounts for reaching purchasing milestones, and more.
This guide explains how to set up the Build-a-box feature using the Shopify
2.0 theme editor. If you are using an older theme, please contact us for
custom implementation support.
Step 1: Create a New Template
The Build-a-box feature requires a unique template to appear on your storefront.
- Navigate to Online Store and click Customize on your active theme.
- Select Products from the top bar and click Create template.
- Name the template (e.g., Build-a-box or Build Your Own Bundle) and base it on your Default product.
Step 2: Create a Build-a-box parent product
This is a virtual product to act as a container for the physical products customers will add to their boxes. Uncheck Track quantity and This product requires shipping.
Note: This product must be different from any of the products actually available to purchase in the box.
Save the product and change its theme template to the newly created box template.
Step 3: Set Up Build-a-box details in Juo
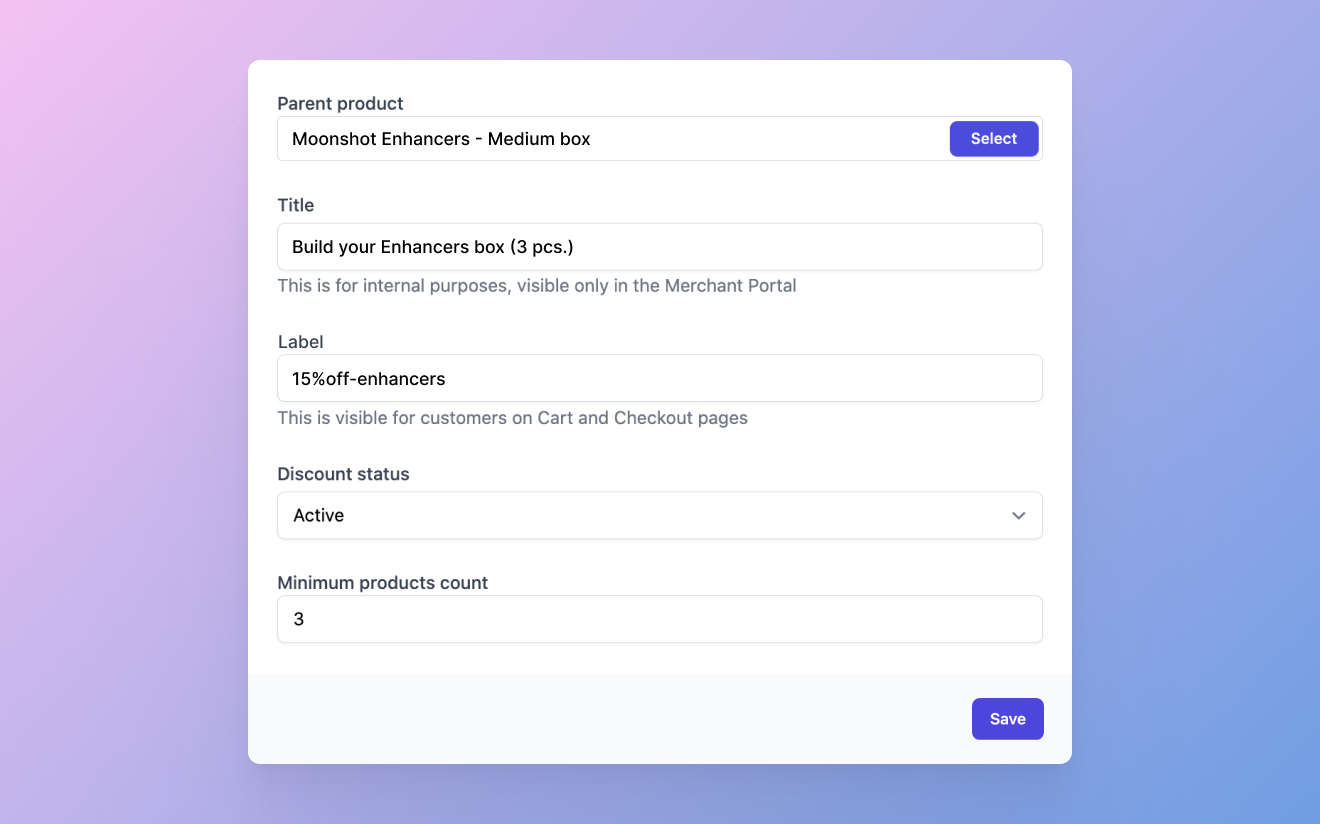
In Juo admin panel, go to Offers > Build-a-box and click on Add Build-a-box. Configure the Build-a-box settings:
- Select the newly created parent product.
- Optionally, give the box a unique name in the Title field (visible only to you).
- In the Discount code field, enter the code you want displayed at Checkout.
- Set the Discount status to Active if you’d like to enable quantity discounts.
- In Discount type, choose Percentage or Fixed amount discount.
- In Tiers threshold type decide whether discount tiers should be unlocked by number of products in the cart, or total cart value.
- Specify the minimum number of products required to unlock discounts.
- Decide if you want to combine the box discount with other discounts within the same order.
- Under Restrict quantity to match available tiers you can decide if you only allow purchases that match your set tiers.
- Click Add to create the box.
Note: after the box is created, just click on “Edit” on the Product boxes list to finish setting it up:
Enhance your Build-a-box feature by setting up a quantity discount that increases as customers add more items to their box.
Determine the appropriate number of tiers and minimum thresholds based on typical customer behavior. Adjust these tiers over time to optimize customer engagement and Average Order Value (AOV).
Step 5: Add Boxable Products
Select products from your inventory that customers can add to their boxes. You can add as many as you want. Next, add these products to a new collection. It will be needed later.
Step 6: Add free products
If you’d like the box to always include specific free products, make sure to add them under Free products. They can work as an additional incentive to purchase the box.
Step 7: Add Build-a-box to a Subscription Plan
Enable subscription options for the Build-a-box feature:
Go to Offers > Subscribe and Save and click on Add new or edit an existing one. Add all the products available in the box and press Save.
Note: You can use products belonging to multiple subscription plans, but Build-a-box will only display delivery frequencies that are common for all products. It means that all products need to have at least one delivery frequency in common for the box subscription to work.
Step 8: Customize the Build-a-box template
Go back to the newly created template in your Online Store and customize it to display your box builder.
- Remove or hide all Product Information blocks (Variant picker, Price, etc.)
- In their place add the Juo Build-a-box block and click on it.
- Scroll down to the Products section. Here, add the collection that you created in step 5. Build-a-box products will be displayed in the same order as in the collection.
Step 9: Set up one-time add-ons (optional)
You can add an extra step to build-a-box experience, where your customers can pick one-time products to complement their box subscription.
In the Juo Build-a-box block settings, select Additional step (Addons) option. Specify Title, Description, and pick the collection to be displayed in the additional step.
After enabling, a Next button will show up for the customers before they can go to the checkout.
Once done, your template should now properly display all the products. You can now further customize the template to your liking.
- Theme allows you to change colors, and radius of particular elements.
- Headline lets you add a custom title and images for desktop and mobile devices
- Filters lets you add filter button to let customers view products only from specific collections
- Subscriptions option lets you enable or disable the ability to subscribe to the box.
Custom frontend
If you are creating custom Build-a-box frontend experience, make sure to add box items to the cart with the following properties:
"properties": { "_box": "box-<PARENT_PRODUCT_ID
  >", "_parent_product_handle": "<PARENT_PRODUCT_HANDLE
    >", "_parent_product_id": "<PARENT_PRODUCT_ID
      >" },</PARENT_PRODUCT_ID
    ></PARENT_PRODUCT_HANDLE
  ></PARENT_PRODUCT_ID
>